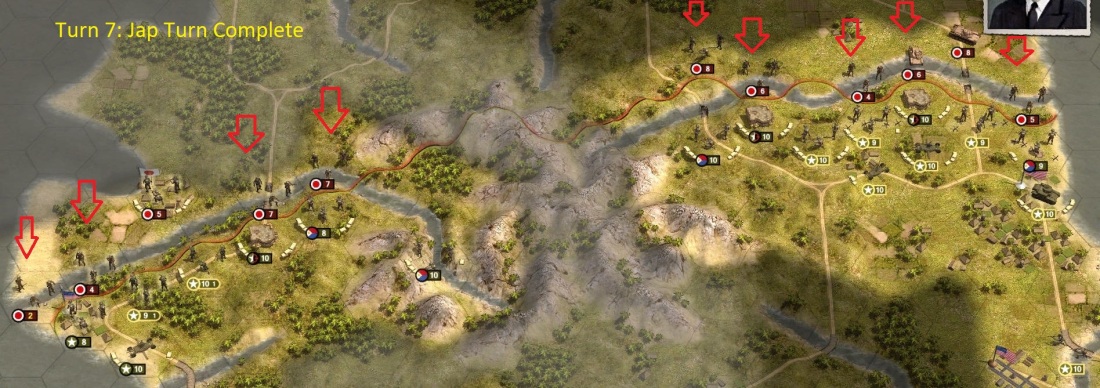
Turn 7: All Out Jap Attack – The Japs send 8 units into the rivers on the right and left flank attempting to force a crossing. The Japs gain confidence when they reach the mid-point of the river without coming under fire. Perhaps the cowardly Americans with their native lackeys have retreated before the forces of Nippon!
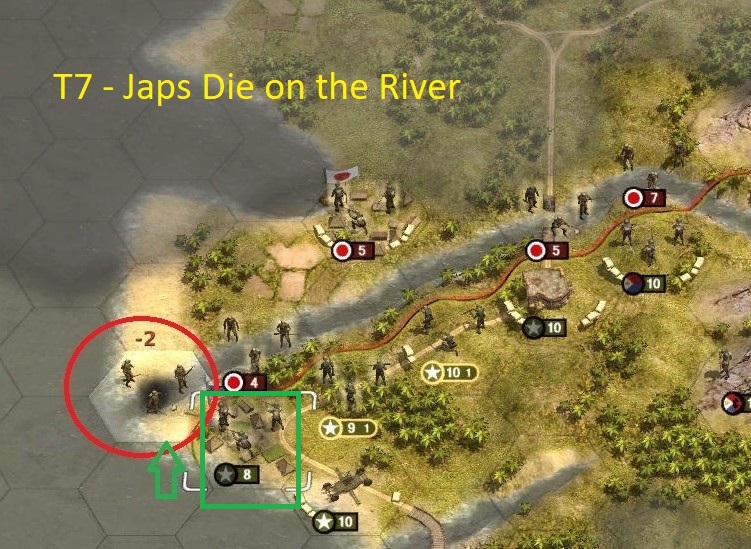
“Open Fire” and the Japs die by the thousands. A photographer captures the death of an entire Japanese Unit under coordinated fire. After “cease fire, conserve your ammo” orders are given we survey the results. Only three of eight Jap units are still in the river – the rest are dead or retreated. The river is choked with bodies. Even experienced Gunnies lose their lunch. River Gators say: “Go USA” as they get a “happy meal” courtesy of the US Marines, Army and Filipino allies.
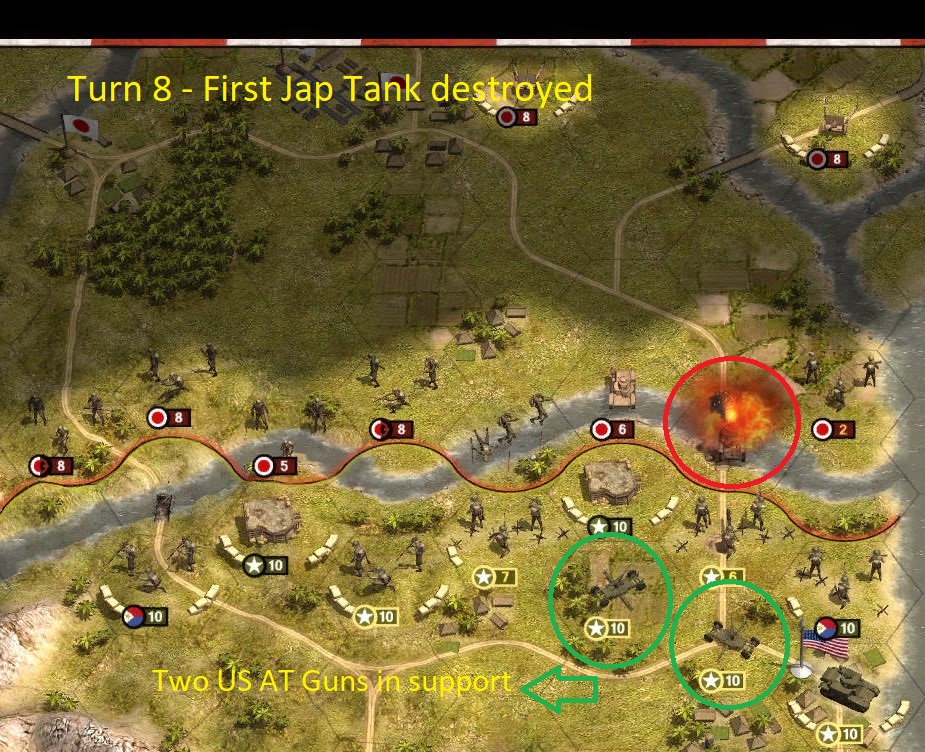
T8: Captain Hiro Simpson, Imperial Japanese Army ordered the 666th Tank Squadron to attack over the blown bridge on the US right flank. Aged Gunny Samurai Smith suggested that “multiple US AT guns were covering the bridge and perhaps, honorable Captain Simpson, the attack should be launched a few hundred yards downstream?” Captain Hiro Simpson pelted Gunny Samurai Smith with a doughnut and ordered the tanks to move forward.
Notice the hex behind the bridge is covered by two AT guns – the worst hex possible for an armor attack. Watch the tank go “boom!”
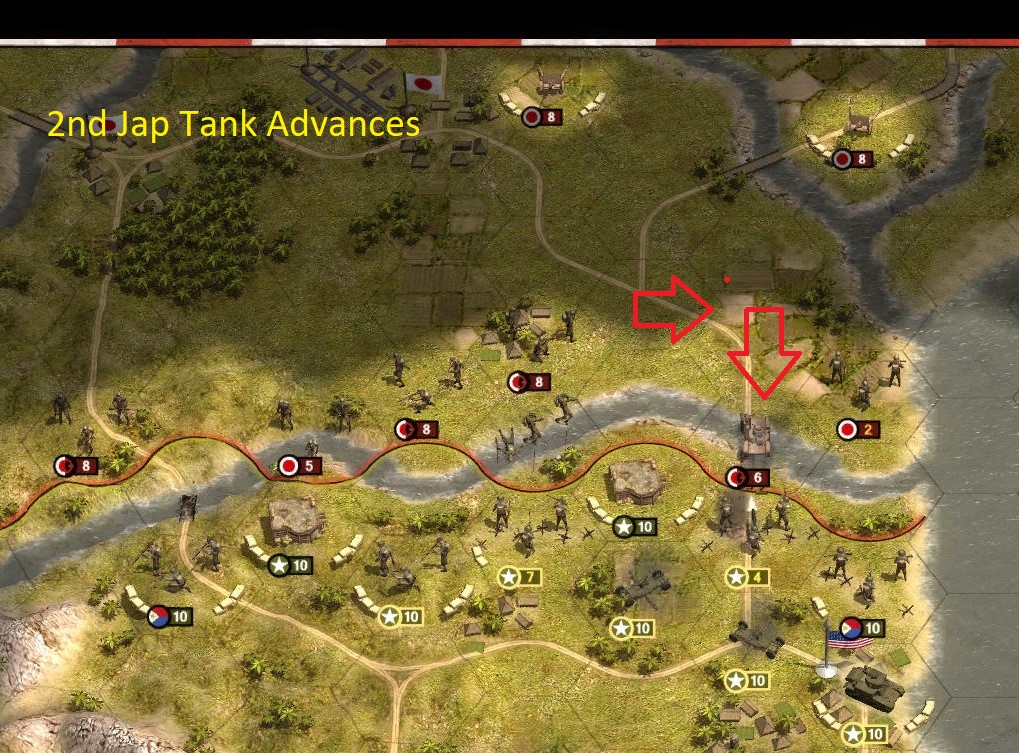
Captain Simpson exclaims: “13th Tank Squadron Forward! For the Emperor and Doughnuts!” Watch the next tank go “boom!.” The next day, Lt. Gen. Masaharu Homma “suggested” that Captain Hiro Simpson go “visit his ancestors.” Capt. Hiro Simpson jumped for joy thinking of his favorite Tokyo Doughnut Stand. Gen. Homma sighed, made a hand gesture to “Japanese Gunny Samurai Smith” who beheaded Captain Simpson with one mighty blow.
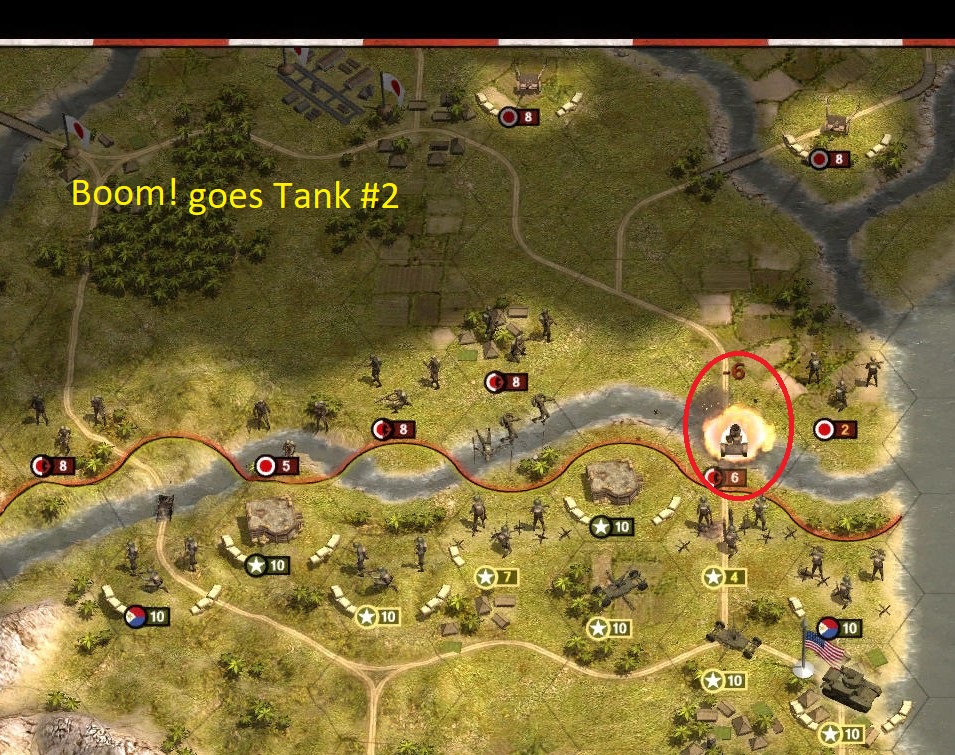
An armor attack over a river into a dug in infantry unit with two supporting AT units is suicide. The infantry unit took 50% casualties (8 health to 4 health) but both Jap Tank squadrons were destroyed. The Japanese launched multiple attacks on Turn 8. What is worrying is all the Jap Artillery now in range.
Turn 10: Left Flank – The Japs have crossed the river and almost destroyed a Filipino unit (in green). With only 2 health and a bright red organization status – it will take at least four full turns out of combat to get back to 100% strength. My forces on the left flank are not strong enough to hold the river line – so I start pulling back. The AT gun is the slowest unit and it has withdrawn.
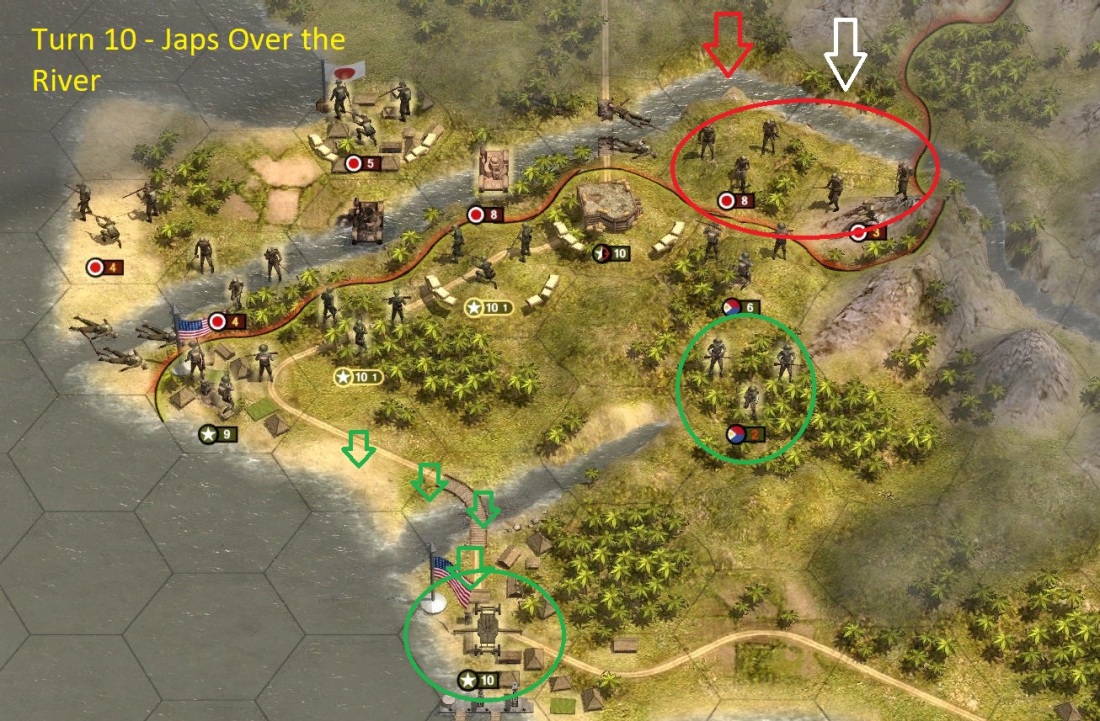
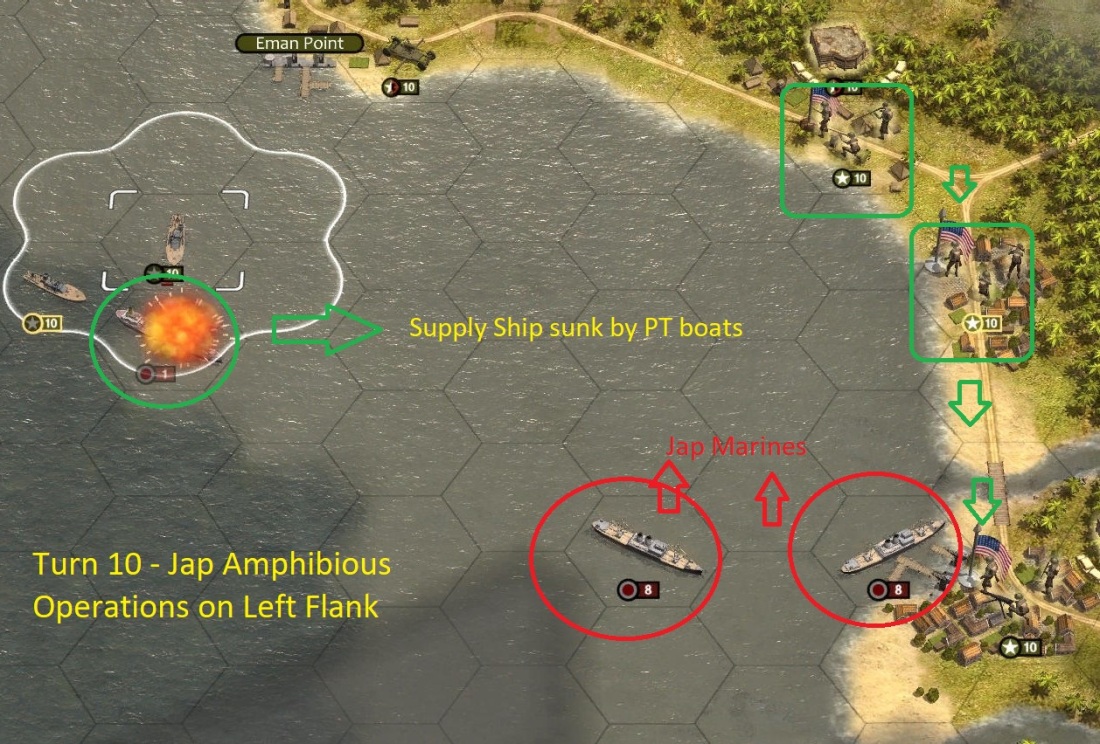
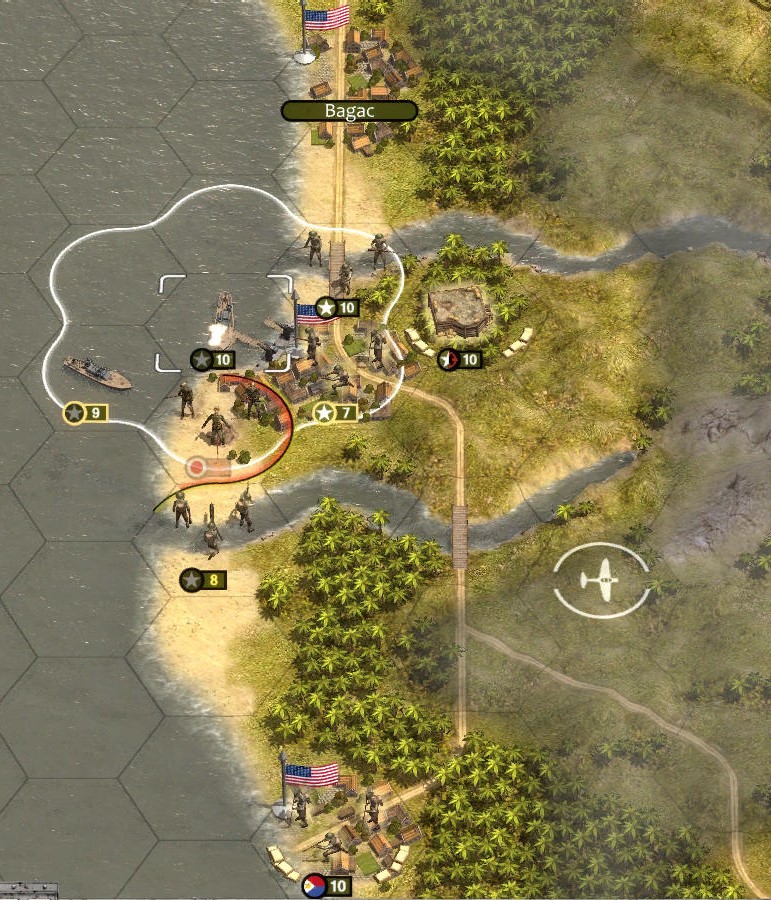
The Jap Marines start landing next turn. But the supply point city is garrisoned, and the supply ship made a quite pretty explosion when destroyed by the PT boats. Enough reinforcements are available to drive into the sea any Jap Marines forcing a landing.
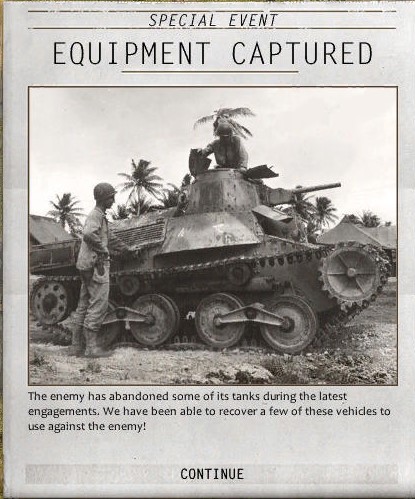
I got an unexpected bonus – a Jap Tank on turn 10. Captured equipment is seldom worth fielding in subsequent scenarios. Only 1 health point can be repaired per turn on captured equipment making them very fragile units. At Bataan the shortage of troops and especially tanks make this a welcome addition to the right flank.
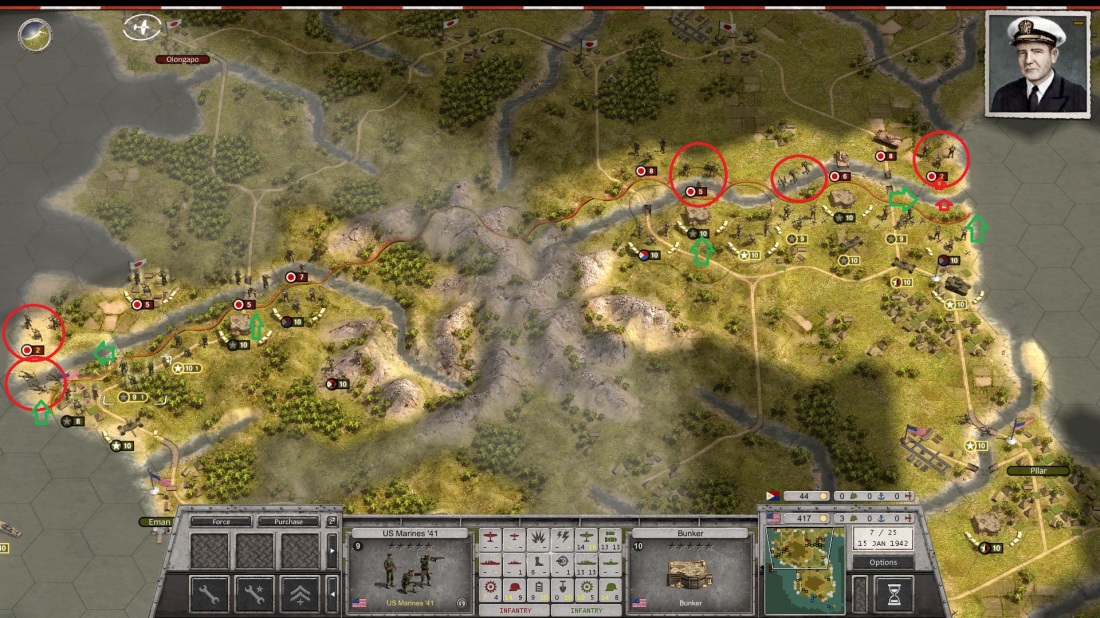
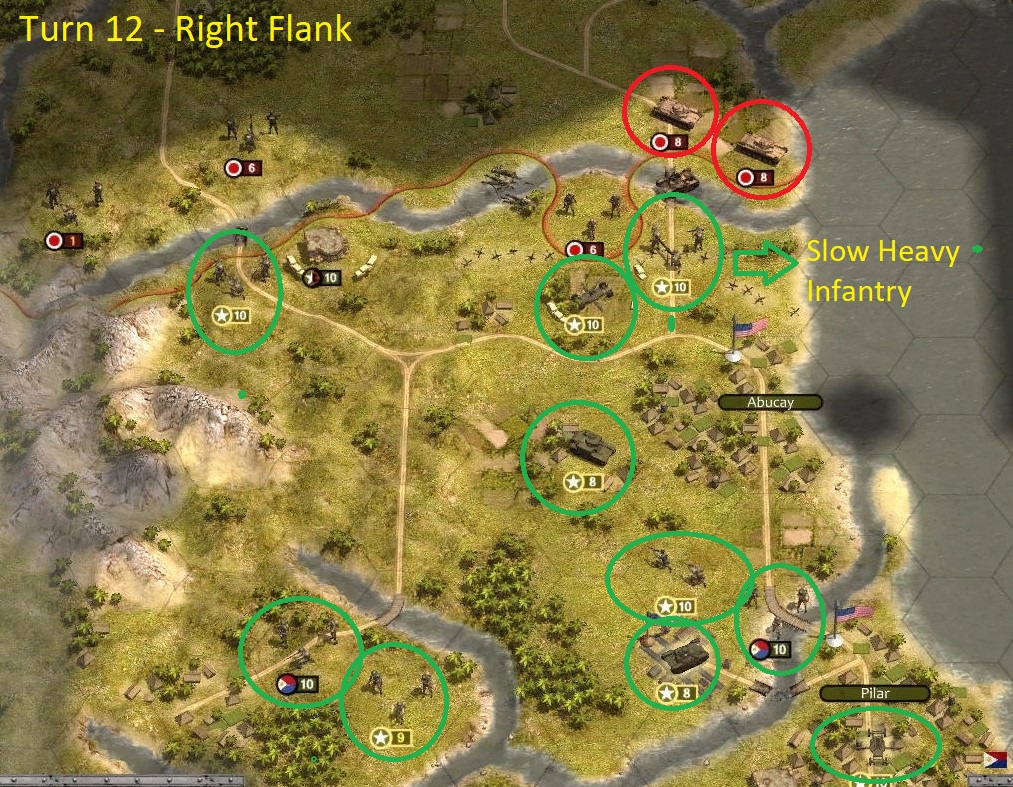
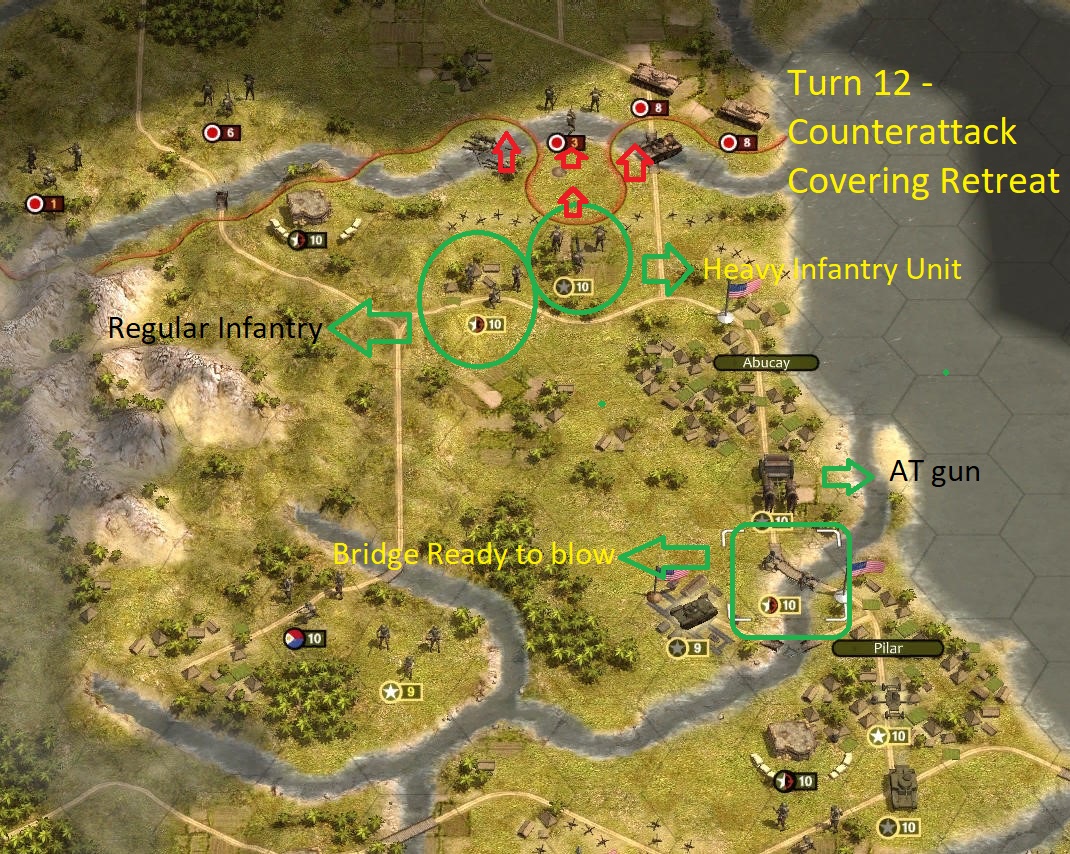
Turn 12: Retreating from the first river line: Jap units crossed both river lines. On the right flank much of the withdrawal has been completed. One of the bunkers on the right flank is blown. Jap infantry is over the river and threatening the AT gun which must withdraw. The AT gun is motorized so it can quickly retreat during the US phase. The remaining bunker will screen the infantry unit on the far left of the right flank. Unfortunately, the other infantry unit is heavy infantry – which moves very slowly. Off screen is a bunch of Jap artillery. You can see the two undamaged Jap medium tanks getting ready to cross the river.
Why retreat? AT guns have little defense against infantry attacks. I can’t screen the AT gun so it must withdraw. The two medium Jap tanks will crush the infantry without AT gun support.
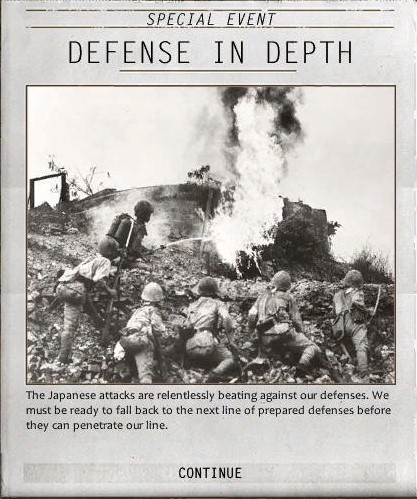
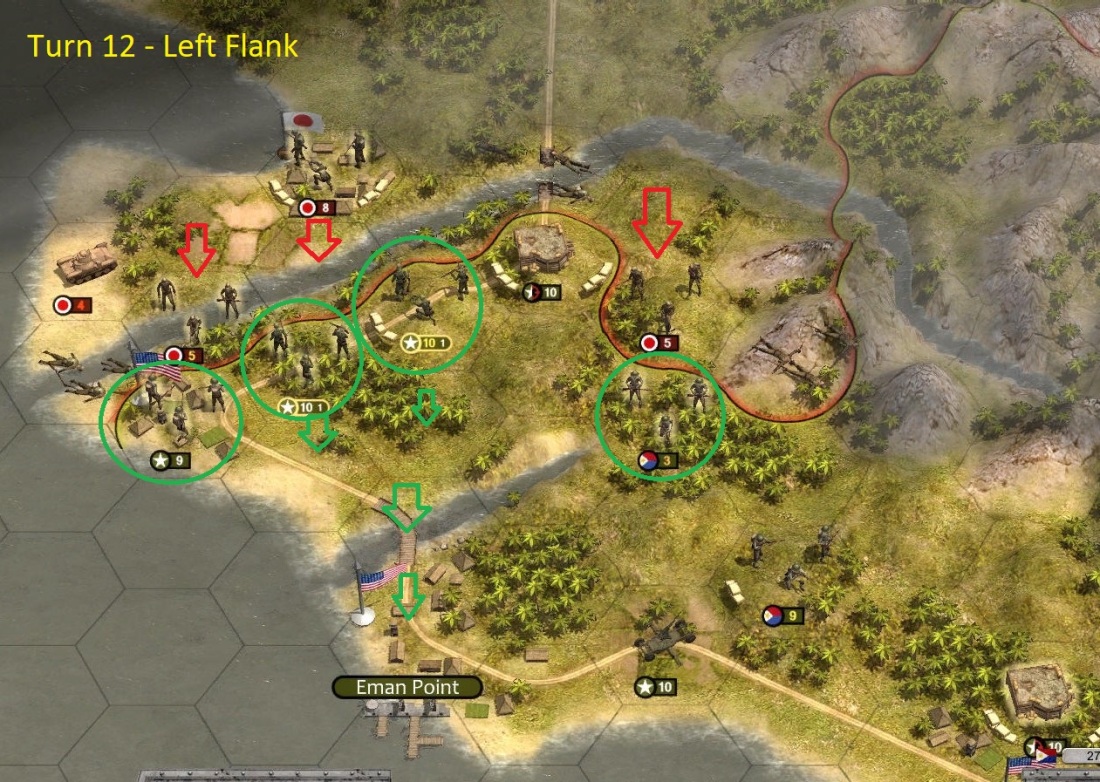
My situation on the left flank is not as severe, but it is time to retreat from there as well. I must hold 25 turns and giving up some ground is finally possible on turn 12.
The Jap landing is a slaughter. One Jap Marine is almost dead (2 health) and the other is damaged. They are out of supply and time. Both will die before the end of turn 14.
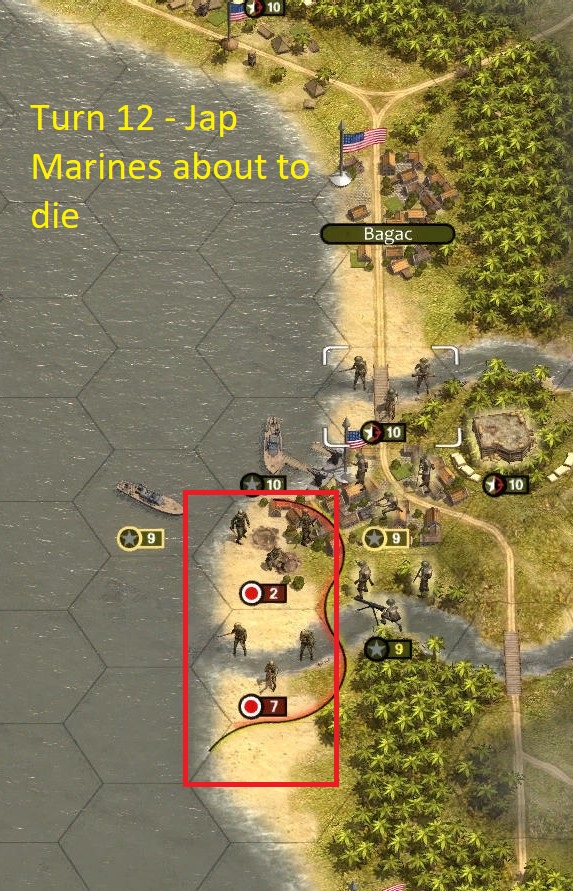
Turn 13 – The Jap Marines die.
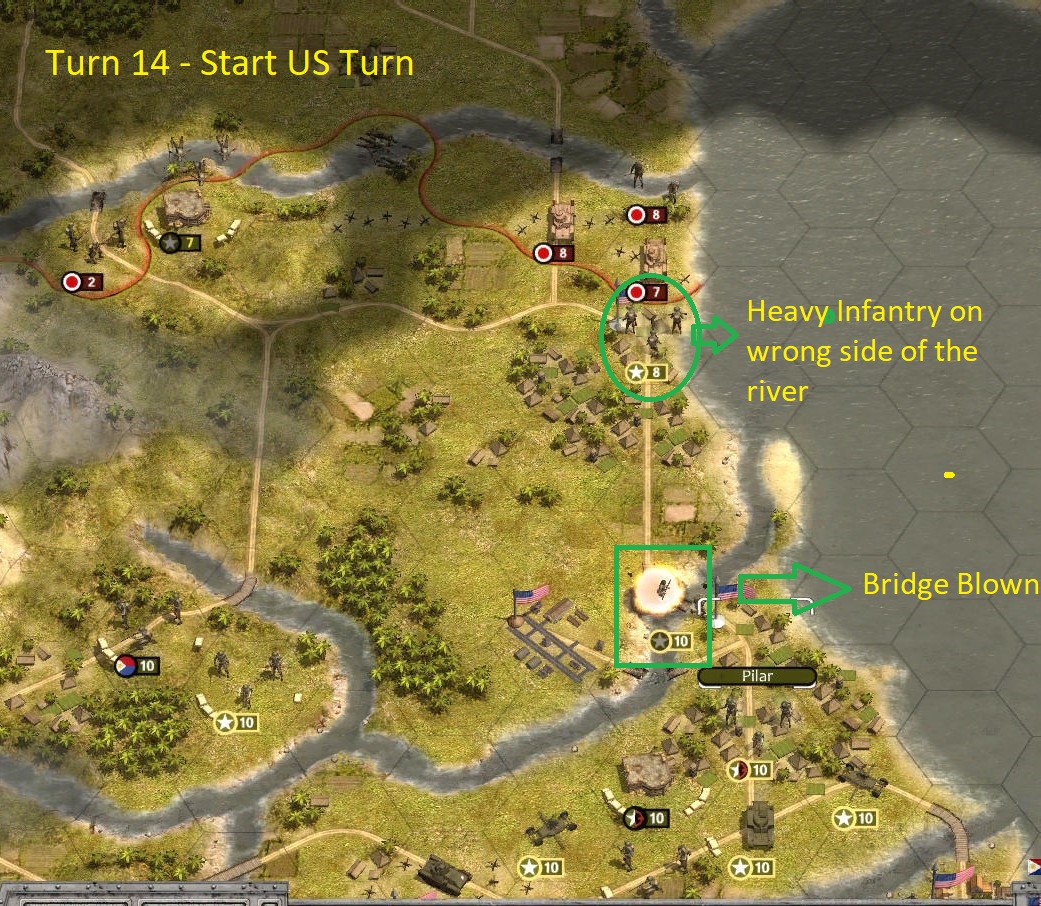
Turn 14 – Commandos blow the bridge over the 2nd river on the right flank. All units are successfully withdrawn the next defensive line – except the US Heavy Infantry unit. It will retreat down the coast road, but they may end up being sacrificed to buy time for the other units to retreat.