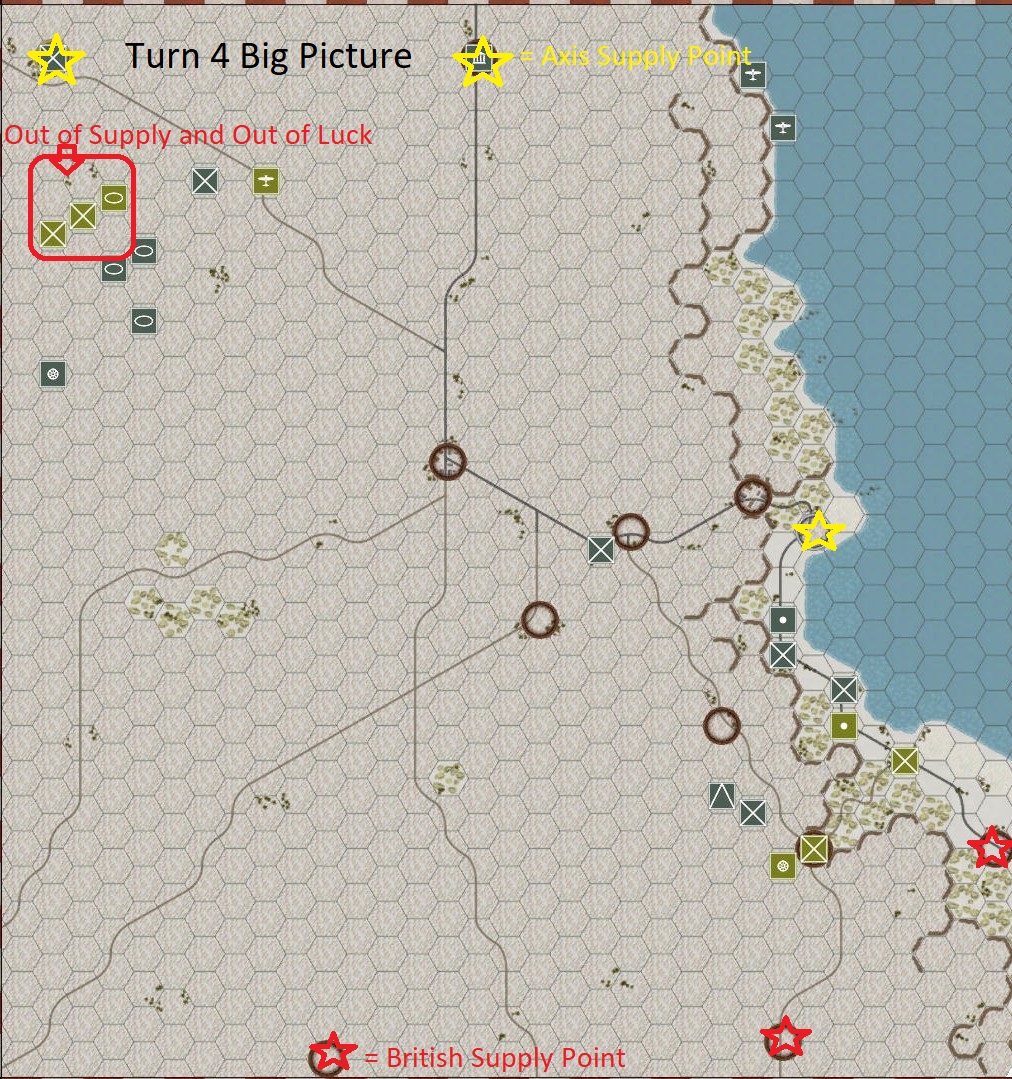
The Axis react to a British offensive in the Halfaya Pass scenario. British Commonwealth forces attack on two fronts: in the South close to Halfaya Pass and in the North close to Sidi Azeiz: a big Axis supply point. The Axis defends in the South for several turns while immediately counterattacking in the North.
Because the powerful British attack in the North poorly protects their flanks, a reasonable Axis strategy leads to an easy win. The attacker in the scenario moves first, so initially I’m reacting to the British attack. I focused on mobility when selecting which troops to deploy. I chose my two Panzer IIIs, two halftrack mounted German Infantry, my truck mounted German Engineer, my primary Italian Armor unit and an unmounted Italian infantry unit. The Engineer rushes to defend Sidi Azeiz while the slow Italian infantry unit is moves South to eventually reinforce defenders there. Everything else is counterattacking. The Panzer IIIs and the Italian Armor use a wedge formation to protect the more vulnerable mounted infantry.

Commonwealth forces hammer the Italians in the South. The Italians retreat and reinforce and Halfaya Pass falls.

In the North the Brits have two unsupported columns. The East column seems to be composed of a medium tank, a light tank and a scout car. The West columns composition is unknown. The Engineer moves directly to Sidi Azeiz while everything else attacks the West column. The counterattack destroys the light tank, isolates the medium tank, and falls just short of destroying the scout cars. 

Victory in the North: Turns 3 to 5
Attackers in the North moved out of scouting range. Having no air force means a lot of uncertainty. The medium tank retreated to the West column and the scout car initially moved due South out of contact.
This poses a problem. If you move into unscouted territory you risk blundering into a prepared defense. The worst case is a key armor unit unexpectedly encountering an anti-tank gun. But if you move only to the limit of scouted terrain your advance is tiny. I compromise. Italian armor chasing the scout car goes full movement because the scout was almost destroyed last turn. My armor advances into the first unscouted hex which spots enemy forces.  Armor smashed the scouted anti-tank gun and my infantry moved to prevent encirclement ending Turn 3 in the North.
  Italians in the South retreated and reinforced.

In the North the British on Turn 4 moved their infantry to contact and halted. They soon learn their forces are tremendously exposed to encirclement. The attack opens with the halftrack mounted infantry cutting off the British column from supply. Armor attacks the two infantry units doing damage and forcing retreat further North away from their supply source.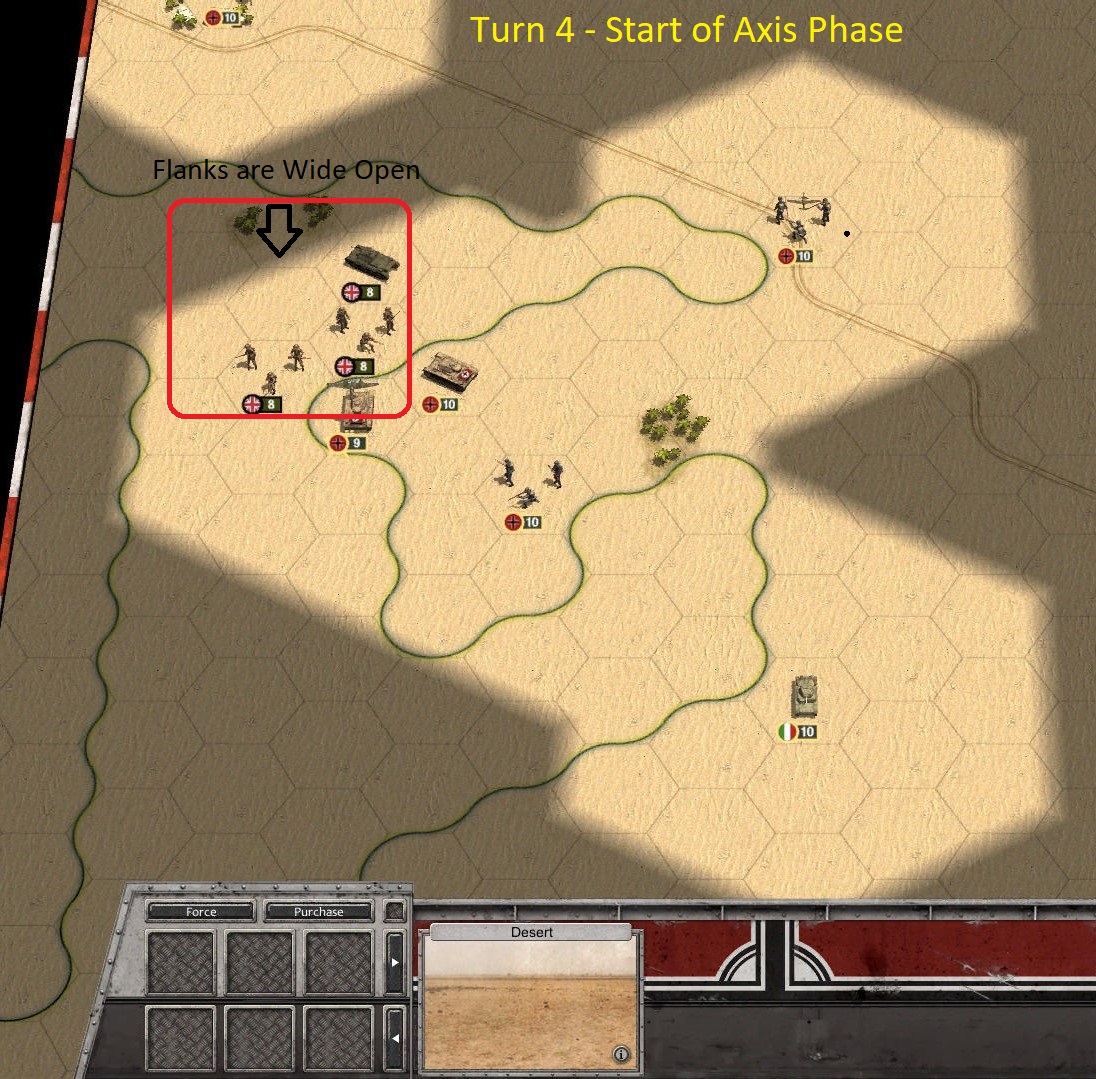


Small number of British units in the South launch unsupported attacks Reinforced Italian troops make two successful counterattacks. The Luftwaffe finally appears with two fighter squadrons. 


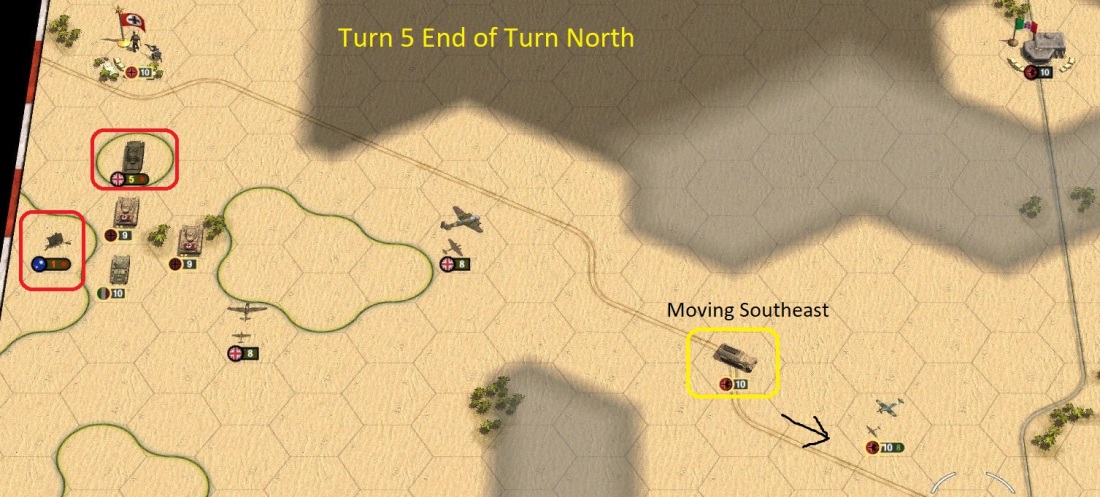
Turn 5 dawns with the Axis mopping up the remnants of Commonwealth forces in the North. Several units are detached to reinforce the Italians in the South.